Thursday 5 November 2015

Turkey Shed - Part The Second

Turkey Shed
The Now Upright Turkey Shed

There's been a bit if a pause between Turkey Shed updates. This is mainly due to the weather. We managed to, after my last post went out, get the four walls up and, as we thought, secured.

How wrong we were!

We weren't able to continue work the following day, so it had to sit for two days without a roof. Then the wind came. Although we weren't that convinced that it was that strong a wind, our morning trip to see the animals proved us wrong. The front and one of the end panels had fallen down outwards. Part of me wished all four had fallen down, just for the comic value of that photograph!

Luckily nothing was broken so we popped them back up and secured them properly. The roof needed re-felting, so while I took the Tinys on the most stressful Halloween outfit shopping trip ever! (Don't ask!), himself put the felt on.

Once I got back, and littlest Tiny went for a nap, we managed to lever the roof into place and secure it.

With the roof on and all the screws in place this shed is going nowhere!

We hope.

And I know what you are thinking, looking at that photo. How do you open the door? It's true, the shed fitted exactly in that space we made. But the plan is to dig out a 'channel' to the door and put in steps going down the hill.

We also need to lay a concrete floor and after doing some calculations we realise that we'd be better getting our sand from a builders merchant and have it delivered. So, that's next on the schedule.

The Turkey Shed continues..


Saturday 31 October 2015

Wednesday 21 October 2015

Can You Dig It? - The Turkey Shed. Part: The First.

Digging a Hole
Levelling the ground and Making Some Space

Our idea this year was to raise our own turkeys for Christmas, well this has failed.

We were very keen on the idea and planned to take on around six little ones and raise for friends and family for Christmas time. Our first step was to get a shed. So I put up a request on our local Freegle page, basically "Shed, please."

I wasn't expecting much. Not many people happen to have a shed lying around that they just want to give away. After a couple of weeks I decided that I'd have to start looking at prices for secondhand sheds. And that was when the email arrived. Someone had an old 6x8 shed (formally used for chickens) that he'd dismantled ready to chuck out, and never got round to it. It was ours if we wanted it.

Did we ever!

The shed was in great condition. The roof needed refelting but beyond that there was nothing else that a lick of paint couldn't fix! We loaded it up.

The next step however was getting the position for the shed prepared. We dawdled. And procrastinated. And ummed. And errrred. And took too long, so we missed the deadline for getting the turkey chicks for this year. But with the shed leaning up against a barn wall we still had to get it erected, there's no way it would survive the winter as it is.

Digging
Flattening Out the Ground

So we decided to get stuck in. The position we have chosen is at the bottom of a slight slope and the flat area is just too small for the shed.... So bring in the big guns...

We had to clear the area and flatten it as much as we could so the shed will stand sensibly. We also intend to put in some, cemented in, posts to fix it too. We get some major wind on top of our hill and we don't want this thing drifting away!

Farm Guy got a great chance to play with a big new toy, so he was happy! Although we did have to take down a fence in order to get the digger in!

We followed our land "flattening" with the digging of some post holes. Once these were dug out we used post cement and water carried in a couple of our thousands of plastic bottles (watch this space for more on those). Soon the corner posts were in and it was just a case of waiting for the cement to dry before we can put the walls on.


Picture of the Field
Our Newly Flattened Spot


Monday 5 October 2015

Thursday 1 October 2015

Gardening With Kids - Square Foot Gardening

Had a couple of people discussing gardening with kids and I am a huge supporter of this. I think it's great to teach children about where there food comes from. Our eldest girl is four (nearly five) and is right into growing! Hurray! Our youngest is only just turned one, so at the moment she has more worries about how to get the food into the mouth, rather than all over the face, than where it comes form in the first place!

Our little ones are (will be) taught about it all, not just fruits and veggies but also meat. We already have chickens for eggs and we do eat the young cockerels when there are too many. We will also be sending a lamb or two to slaughter for our freezer. Obviously, I am a meat eater and I have no qualms about eating meat. But I also have no misconception of what is going on. Where I have no problem with eating meat in itself I do have issue with the welfare of the animal before and during slaughter. Just because an animal is going to be used for food doesn't mean it doesn't deserve respect and to be treated kindly and fairly. This is what I will teach my children. I will teach them that it is not wrong to eat meat, it's a choice, like choosing not to, but it IS wrong to mistreat an animal anyway during its life and death.

Sort of went off on a tangent there! At this moment we are talking about the slightly less controversial topic of fruit and vegetables. Why do I teach them about growing fruit and veg? Well, firstly because it's fun! Watching things grow. Making them grow! And then being able to see, literally, the fruits of your labour! Then you can eat them! The second reason is to show them how much effort it takes to grow, even a small amount, of food. Help them understand how long someone, somewhere, has to work in order to provide them with things to eat.

It's not about preaching to them but I think that the more we understand about how things are done the better! And that counts for me too. I'm a question asker and never turn down a tour. I recently got to look round the dairy farm over the road. I asked about everything from the cows, to breeding them, to milking, to the computer system they use to track the cows and milk amounts! Do I want to start a dairy? Nope. But I like to understand the jobs and lives of others. It's a bit like the old saying of walking a mile in someone else's shoes, learning about other people's lives makes you a more understanding person, I think anyway!

So, my daughter was learning about seeds at nursery, in a very basic way and she had also learned, at our local Science Centre, the science of how a seed works. Well, after the nursery topic was over home she came with the Broad Bean plant she had grown herself. And very proud she was too! It spent a while on our windowsill but it longed for more!

I had been investigating square foot gardening and I wanted to give it a try so I saw an opportunity. A square foot garden would be a great way for her to plant many different vegetables and also a small area to avoid her getting bored of the work taking care of it.

For those unfamiliar with square foot gardening it is much as it sounds. You split the garden into square foot sections and plant within those sections. There are plenty of websites on this topic, with planning designs and rotations. I may well do my own in the future but until then I promise you will not go lacking. I can recommend Dave's Square Foot Garden blog for some great inspiration!

Square Foot Garden
Toddler Garden

Our garden was just the one bed and it was four three by three feet, giving us 9 squares to plant in. Initially there were two broad beans, her nursery one and another that I donated. We also planted a potato and a few onions. These were quickly followed by lettuce and spring onions, seed gifts from Grandad that had come free on a bottle of sherry he bought. (Nope we still aren't sure what seeds have to do with sherry, but free seeds are free seeds!). We also added some carrots. These were experimental carrots, and so far, (bar the one featured here) are the only ones to grow!

After a terrible batch of weather, something we have seen too much of this year, one of the Broad Bean plants succumbed. So we replaced it with a cabbage. And added a kale and a cauliflower for good measure.

So, what's actually in there..

  • 1 Potato
  • 1 Broad Bean*
  • 5 Onions
  • Cut and Come Again Lettuce
  • Spring Onions**
  • 1 Kale
  • 1 Cauliflower
  • 1 Cabbage
  • Carrots (multicoloured)

She has been very much enjoying the garden, showing it to everyone who visits. Nibbling on lettuce and spring onions as she passes. We have also harvested some of her broad beans which she enjoyed helping me prepare and insisted on something for tea that would "go with Broad Beans".

All in all I am very pleased with the square foot garden. I think it is something that we should extend in the following years and really make the most of. I feel we have probably not utilised the area to the best, as we had no proper growing plan, but it was done as a fun, mildly educational, experiment and as such has been a huge success.

*Are Broad Beans called Broad Beans in the U.S.? Can someone let me know!

**Spring Onions, for my US readers, are what you call Scallions.


I'll let you know in the future how her garden fared!


Monday 27 July 2015

New to Ewe & Harvest Monday

Shetland Tup
Just For Ewe

Our handsome tup has arrived!

We picked him up yesterday. We met a wonderful lady, called Sue, who was a fountain of knowledge when it comes to Shetlands, and sheep in general. We learned an awful lot sitting in her kitchen, drinking tea, our children slowly trashing her house.

It sounds corny but I think that sitting talking to someone is a better way of learning than anything that a book or whatever can teach you. You can stop people and say, "what do you mean by that?" or "Explain that again, please." I certainly hope that our Lamb Lady doesn't mind that I might be contacting her regularly with a whole variety of questions as we progress through our first year of shepherding!

We are keeping our boy separate from the girls for now, but near them so he's not lonely. And so far the introductions have gone well. He's a born and bred hill sheep so smallholding life has given him a serious case of the bug-eyes!

"What's this!?"

"What's that?!"

"Where is this?!"

He is joining the goat in her newly created goat paddock, hopefully if it can contain our escape artist goat it can hold this yearling dude. Introductions between goat and sheep where very brief and dignified. I think that an understanding has already been established. He showed off his horns, she replied with "I may no longer have horns but I have stumps and I'm not afraid to use them. And I'm bigger than you." So they both lifted their heads, gave a wink and moved on. That's been it, Mindi is very uninterested in him.

Shetland Sheep
Meeting the Ladies

Our ladies were much more interested in meeting the stud next door. Even if he does chat a lot. They came scooting up the field when I appeared, saw him, ran away! then quickly came back to sniff the new neighbour. Once he realised none of these sheep were sheep he recognised he wandered away, but he came back shortly, realising he had to take what he could get.

I am checking on him at intervals to make sure he doesn't do anything stupid but at the moment I am edging towards positivity that all will go well. It's actually quite scary, worrying that something will go wrong; he'll get in with them or he'll run away! I guess learning anything new is worrying but when it involves living things, that you are responsible for, it kind of ups the anti a bit!

Today is also Monday so that means it's harvest time! The weather today can only be described as stinkin'! It has been raining all day without letting up. But me and the bigger little one headed out and managed to gather these beauties.

Harvest
Broad Beans and Courgettes

A huge amount of Broad beans. The beans at this end of the basket come from my daughter's single plant in her little square foot garden that she has been working on.

Two decent sized courgettes. I've a mind to try a courgette cake or loaf with these!

I think the potatoes will be significant when the time comes and there should be good stocks of onions as well. Just wish we'd get some decent weather to help these poor plants along.

This is my entry in Harvest Monday's hosted by Daphne's Dandelions!

Want to see more harvests? Got bumper beans? A lotta lettuce? Or pots of potatoes? Then head over to Daphne's and add your name to the list and then check out the other harvests!


Friday 24 July 2015

Our Sheep Get Their First Haircut

Field Of Sheep
Is It Just Us or Is It Chilly Now!?

Shearing is not a new thing here on the farm, we have always had to shear the goats, but it was still quite exciting getting the girls sheared for the first time. The local shearer came in, as we are just a small flock he brought a kind of put up shearing station rather than hauling in the big trailer affair reserved for the bigger flocks. And bigger sheep!

The ladies were very well behaved and the whole thing didn't take too long. They looked at me the whole time like "Mum, what is this man doing? We don't want to be upside down. Can't we just go back to the field?"

I wondered how they would take to me next time I appeared with a bucket. They had run in as they usually do, that morning, so well behaved! Would they believe me the next time or think that I was up to something again!

We were left with a big bag of wonderful fleeces. I've only ever seen the Angoras fleeces before and our Angoras were grubby beasts!! These sheep fleeces are all relatively clean and in one big piece. And so soft!

Just need to decide what to do with all the fleeces now. Do we get rid of them or use them for ourselves? My spinning, and for that matter knitting, skills are pretty slim! But I am starting out in needle felting so the fleeces could make a lot of little felt whatsits! Or I suppose a wet felted scarf or something!

Fleeces
All Laid Out

At the moment I just like laying them out and looking at them. I absolutely love the dark brown one, I think whatever happens I'm going to keep that one!

Perhaps I could clean them and make sheep fleece stuffed pillows! I wonder if that would work?

There will be further sheep happenings at the end of this week as we go on a trip to try and find ourselves a tup (breeding ram) for our ladies this year.

Due to the stars aligning wrongly the only date I can't do in August is the date that our local sale is! So we have been scouring the country trying to find a gentleman from local breeders. Join me on my Monday update to find out how we get on.


Wednesday 22 July 2015

Goats - Now You See Them...

Over the Christmas period we lost our older goat, Cindi. This has meant that Mindi was on her own. With the addition of the sheep it was hoped that she would find friends and peace. Initial introduction went relatively well (if you missed that instalment check it out here).

Well, her friendship turned as she became the sheep/goat equivalent of the Don! A criminal mastermind with a following of minions. She leads them on rampages through fences, into neighbours fields and around vegetable patches. All with an innocent look on her face.

The final straw came when, after we prevented her climbing over and flattening all the fences to allow her posse through, she lifted the fence and took them under. She took them to a small paddock by ours that has a horse and donkey in it.

With only a four year old to help I traded her in with our next door neighbour to get a more useful sheep wrangler. We managed to get them out of the field and onto the road to bring them up to our main gate. Something then scared them so they legged it up the road, past our gate and on. They then nipped into a field owned by our dairy farm neighbour, and disappeared into the distance.

Luckily the farmer in question appeared at that moment and got his quad bike and rounded them up, we brought them back up the road and back into the yard. He then went after the goat who'd given him the goaty finger the last time.

So it has been decided that Miss Goat would be given her own private and (hopefully) goat proofed paddock where she can enjoy life and stop leading the sheep astray. It's right next to the sheep so she still has some company.

So, I thought I'd give you the low down on DIY fencing.

By DIY don't think patched together, I mean it more as being able to put up your own fences without having to pay a contractor. We still use real fence posts, stock wire and fence-post-putting-in-equipment. Just no major heavy machinery. Without heavy machinery you won't be able to put in strainer posts. These are the big fat posts with the diagonal support that are usually at the corners of fields or used to hang gates. But you will be able to make decent fencing enough for smaller farm animals, (even goats, hopefully). We even use it for horses without issue.

The tools you will need are:

  • Sledge hammer or fence post driver
  • Stock fencing or chicken wire
  • Straight, barbed or electrical wire
  • Digging Bar
  • Fencing Pliers and Wire Cutters
  • Fence posts: square or round
  • Fence staples and a hammer
  • Able helpers

What Are All Those Things!?

A fence post driver is a heavy metal tube with a closed end. You place it over the end of fence post and use it to thunk the post into the ground. It's good if you aren't strong enough to lift the sledgehammer repeatedly. We have both but I find a broad shouldered husband and a sledgehammer are the best way!

Fencing
Use A Quality Workforce

Stock fencing or chicken wire. It's a personal choice and dependant on what you are trying to contain. You can buy both in rolls of various sizes so get whatever you need.

Fence posts, again this is a matter of choice. We use both without any real noticeable difference.

A digging bar is a heavy metal pole or spike that is used to make the guide hole for the post.

Straight, barbed or electrical wire. This again is your choice. Many people avoid barbed with 'tender' animals to avoid damage. Electrical is good if you have a power supply.


Fencing
Dunt That Post!

What Do You Do?

Your first step is to choose the line you want your fence, sounds daft but you need to know your line to ensure your fence goes the best possible route. It is also pretty tricky to remove a post once it's in, so you want to get it right.

Next make the pilot hole with your digging bar. Drop the pole from a height to allow it to pierce the ground well. You are looking to sink it around 6 inches into the ground. Once it's in move it side to side to open up the mouth of the hole and allow easy access for the pole.

With the digging post still in the hole is a great time to check your fence alignment. Move back to the beginning of your line of posts and crouch down. Use the bottom of your posts to check alignment not the tops. Unless you are using a spirit level to check uprightness, your posts may not be perfectly vertical so the tops will not give you an accurate line.

Remove the digging pole and insert your post. Then using the sledgehammer or the fence post driver (or husband) to dunt that sucker in! You are trying to get the post in far enough that it is stable, about 1 - 2 feet will work on most ground types.

Rinse and repeat until all posts are in place.

Finished fence
TaDaa!

Once all your posts are in it is time to put up whichever fencing your chosen. Regardless of type the best thing to do is unroll the fencing along the line of the posts before you start fixing. Position the wire on the first post with a few inches to spare and secure with staples. Three should be fine, top, middle and bottom. Then move to the next post and pulling the wire tight. This is where a second person can help and the fencing pliers are a useful bit of kit. Try and get the wire as taught as possible. If using chicken wire this can be a difficult undertaking as it has a tendency to distort. I gave no tips to give on this, I'll update you if I think of any!

Continue along the fence posts securing the wire. When you reach the end cut the wire off, again with a tail end. Then, for both ends, wrap the extra wire around the post and secure with a few more staples.

Your next step is to put on your top wire. It is done the same as the lower wire but obviously requires only one staple on each post. If you are using electric you will need various accessories. I will do a section specifically on electric fencing later on.

Pallet Gate
Place the Pallet Over the Posts

Now, at some point you will need to put in access to your fenced off area, and as I have said without machinery you will struggle to hang a full size gate. If, like here, you will not need access for vehicles then a garden gate would do but here's an up cycling idea: pallets. We use them for gates all the time. For ones that get opened a lot we just lean them against the gap and tie them but this is not really a gate as such, more an optional opening, so we tried something different and more sturdy.

You probably noticed through the photos that we are using round posts for the fence. But that there are two square posts at the beginning. Very simple. Hammer in two posts distance such as to allow a pallet to be slipped over them. This makes a "gateway". It's sturdy but easily removed.

So there you go, the super quick fencing guide from the Dream Farm. Get out there! Fence something in!


Monday 20 July 2015

Harvest Monday - First (Proper) Cold Frame Harvest

Well, our first true cold frame harvest. One decent sized courgette and four, rather sweet, little cucumbers.

And a carrot.

I know this is hardly life sustaining but after our horrendous start to the year I am just glad to be getting anything from anywhere.

I am very much loving the cold frame though, it has been amazing in how well it has helped the garden along. This is my first time using one so I will admit to using it a bit like a greenhouse at times, hence the cucumbers and courgettes.

My dad built the cold frame for me, check out a picture at the bottom of this post.

It has been amazing for bringing on the seedlings and some of the plants that normally I'd assume to be pretty hardy, but in this years horrendous weather they've needed all the help they can get!


Monday 13 July 2015

My Great Scottish Swim

Swimmers
Swimmers in Loch Lomond

Veering away from self-sufficiency and gardens for a moment...

I have signed myself up to do the Great Scottish Swim. This is one of many swims that take place across the country. There are different lengths of swim at each venue, to suit all levels of swimming ability.

This swim is in Loch Lomond, which is perhaps an hours drive from us, and offers, I think four different swim lengths. 1/2 mile, 1 mile, 2 mile and (for some reason) 5 km. Not sure why there is a unit change but there you go.

I am a relatively competent swimmer but am still working on my fitness levels. I have also never done open water swimming before so I have chosen to do the shortest distance, the 1/2 mile. For those wondering how long that is it is roughly 32 lengths of a 25m pool. I figured I could probably have physically managed the 1 mile length but as its open water, cold, waves... whatever, I don't know what to expect, so better to be safe than sorry!

As Loch Lomond is not, as far as I'm aware, heated in any way a wet suit is required. Well, here's a world I know nothing about! And if you are in the middle of any weight loss programme the wet suit will NOT make you feel like you've got anywhere! After research, I found I was the biggest size of every make of wetsuit! (And that's with a two stone weight loss after my baby). And after three (yes, three) attempts to get the thing on it is not at all flattering! But it has made me feel like this is really happening!

Swim on my friends!


To find out more about the Scottish Swim, and the others, check out the website: here.


Wednesday 8 July 2015

Soda Bread


Soda Bread
I Make No Apologies!

Well, if you've been copying along and trying out a few of our recipes and you had a go at the butter making, well you should have a jug of buttermilk sitting about needing to be used up. Well, here's a recipe that'll get it used up!

This is for an Irish Soda Bread. There are various different versions of the Quick Bread but this is one if my favourites. It's a great wee recipe for when you fancy fresh bread but haven't time for the traditional proving. The raising agent is the Bicarbonate of Soda (Baking Soda) which reacts with the acidity of the buttermilk to make the bubbles and the rise. This does make it a 'heavier' texture but don't be put off, we aren't talking brick here :)

It's much like a cross between bread and a cake. We use it for cheese on toast, with butter and jam as a snack or with soup. I definitely recommend the butter and jam option! I make no apologies for your waistlines!


Ingredients

340g Self Raising Flour

340g Plain Flour

1 tsp Salt

1 tsp Bicarbonate of Soda

300 ml Buttermilk

Method

Mix both the flours, salt and bicarbonate of soda together.

Add the buttermilk.

Mix to form a stiff dough. If your mixture is a little dry then you can use a little more buttermilk (or straight milk) but you don't want your dough sticky, so be careful as you add.

Turn out the dough and knead briefly. Don't over knead, this isn't like normal bread and over kneading can affect the rise.

Shape into one large or two small rounds and place on a floured baking tray.

Bake for 30-40 minutes in a 200oC/400oC/Gas 6 oven. The larger one will take longer than the two small so bear that in mind.

The bread is ready when it is hollow sounding when tapped on the bottom and golden on top. It may split slightly, don't worry about that.


So there it is, Irish Soda Bread! I know this'll become a firm favourite with all who try it! And it's so easy!!


Monday 6 July 2015

What's Growing

The weather here has been most unkind to us this year. We've had hot spells, when you think the time has come to get the seedlings out, immediately followed by driving rain, howling gales and overnight frosts. It seems to change weekly, knowing what to do has been near impossible!

Potato Patch
Misaligned Potatoes!

The first thing that got planted up were the potatoes and even they struggled with the weather. The first shoots the put up were almost immediately struck down with wind burn after a particularly nasty, and sudden, gale that struck.

But they soldiered on are now looking wonderful! You may be wondering why they are not earthed up, nor are they in neat rows. Well, I can answer that in one word; chickens. The chickens found their way into the veg garden and now are impossible to keep out! They've actually not been the menace I thought they'd be. They haven't gone for the plants at all and have kept nasty beasties at bay. However, their scratching isn't great for seedlings or plant in place veg like carrots, and apparently, potatoes. I earthed up the potatoes, neat heaps and gulleys. I would then return the following day to a perfectly flat bed with the potatoes poking through again. I earthed them up again, next day, neat, flat, chicken scratched bed. So I gave up. It will reduce my yield but I'm not fighting. I'll figure out an anti chicken system for them next year.

Onion and Broad Beans
Weeding Impossible

The next bed is my strange mix of Broad Beans, Lettuce, Onions, Garlic and Shallots.

This was not the original planning set up but due to the crazy weather effecting not just the plants but my ability to dig the beds, this bed became the "Whatever is ready and still alive" bed!

Weeding around onions sucks!

These Broad Beans got hit by a batch of our random wind which snapped pretty much all of them. But they pulled themselves together and grew again. They are dripping in flowers and we are hoping for a great haul!

The onions, garlic and shallots are doing fine but again I'm not sure about how the weather has affected them. They seem to have grown a huge number of leaves each and the bulbs look quite small. I am hoping they'll swell up soon, but as one has already grown a flower, I'm not holding my breath.

Veg Bed
The Cabbages and Friends

My final bed is the brassicas bed. And yes, more Broad beans. There will also be peas in here.

The Broad Beans were a bit of an experiment. I tried putting them straight into the grown and growing them in situ, just to see what difference it made. It appears that they have grown shorter than the 'window sill' raised ones. I am wondering if this is a result of the winds, the plants are staying low. I think I'll try it again next year to see if the same result is achieved. It certainly has helped protect the plants from the snapping fate of the others.

The rest of the bed has cabbage, kale and cauliflower. They were raised indoors, then spent weeks in the cold frame before I dared to move them outside. They have taken well but I was still concerned about the wind, so...

...that's why the trellis appeared and a rushed planting of peas, just trying to put anything in that will act as a break against the wind. Particularly after my mum said "oh, cauliflowers! Aren't they difficult to grow? I only ever get leaves!" - Panic! Lol

Lettuce
The Crazy Salad Leaves

Ok, so I had to let you peek into the cold frame! The cut and come again salad leaves are taking over! They are splatted up against the lid! We just can't eat enough!

But I am loving my cold frame. My dad built it for me, there are three sections with lids.

Then there is also two uncovered sections, basically raised beds, next to it. A smaller one, I'm using for carrots and a larger one, about the size of the entire covered area, that I'm using for strawberries.

It has been a great help with my growing. I currently don't have a greenhouse so any help with the more fragile plants is of great use.

I am trying cucumber, pumpkin and courgette in it this year. We've had great success with cucumbers in the past so hoping for great things again this year.

Cold Frame
Dad Built the Cold Frame and Raised Bed

Here's the cold frame in all its glory. Please excuse the mess! We are still in the process of converting our veggie patch.

For those new to the blog the veggie patch used to be part of a field and was completely full of weeds! See the weeds behind that wall? That's what it looks like if you turn your back on it for a second!

We have been weed killing like people possessed and have a rototiller thing now which we will use to prepare the whole area for new beds and nice, and importantly flat, grass paths.


Friday 3 July 2015

Wooly Arrivals

Sheep
Our Flock on the Move
We have long discussed the possibility of getting sheep on our little patch but never really set ourselves a date for getting them. Well the decision was made for us rather abruptly. A friend of ours had bought, on the spur of the moment, a group of twenty sheep at a lamb sale. He had gone for some other sheep but when this group came in at the end, no one was interested so he put in a bid and won them. He then decided that he had no use for them. He sold ten and then offered us the remaining ten. We accepted and the gang arrived.
Sheep
Our Friendly Flock Leader
He was unsure what their breed was, he only knew they'd been used for ground clearing. I hit the web and local agricultural shows and have determined that they are Shetland Sheep They are slightly smaller than your normal sheep, they are known as Primitive Sheep. Apparently the knitwear known as Fair Isle originated in the Shetland Isles and is traditionally made from Shetland wool!
They are relatively easy to care for, look after themselves well, can survive on not the greatest quality food and are pretty capable when it comes to lambing. But then I suppose if you're designed to survive on Shetland you have to learn to just get stuck in and get on with it!
This has all been great news to us, our randomly obtained sheep have turned out to be a great starter sheep! However, I do not condone getting sheep without some research into the best breed for them!
The sheep joined our Angora goat, Mindi in her field. At first she was unsure of these woolly interlopers and came over to make certain we understood entirely that there was, in her opinion, not enough room for them in her field. And they smelled. She was equally unhappy when they investigated her house, a couple got a butt in the, well, butt!
Sheep and Goats
Best of Friends
The next morning there was definite racism in the field. The sheep had squished themselves at the very bottom of the field, which borders our neighbours sheep, and the goat was squished against the fence at the very top of the field. After the introduction of a bucket of feed however they were best friends.
They are now best friends and the sheep look to Mindi like she's Big Momma. Should we go through the gate like the lady says or should we run around all over the place and make her flap like a chicken?
The main reason of getting sheep on the land was weed control, an addition to our goat. But we will also be looking to breed with them later in the year. So watch this space for lambs! We will mainly just sell on the lambs and/or any older ones that we no longer want/need. But we will also be looking into the possibility of having them butchered and prepared for our own freezer. But that will depend on if the numbers add up!


Thursday 2 July 2015

So Hot!

The weather has suddenly turned toasty hot here! Ridiculously so! I know it's probably nothing compared to what some people get but for a windy hill in Central Scotland it's crazy hot!
Our Malamute isn't enjoying it at all. He only gets a few weeks a year like this but he doesn't look forward to them. Nowhere is cool enough. With the door open its not cool enough. With the fan on its not cool enough.
I put ice cubes in his water bowl to try and help out but it's no good! A friend of our used to get the paddling pool out for his Mal but Apache won't go anywhere near anything water related!

Some of us are enjoying the nice hot weather though!

All this hot weather means lots of watering needed and our hose doesn't fit on the tap,which is upside down anyway, so it's watering cans at the ready!


Monday 29 June 2015

Frugal Spreadables and Kids Activity

So, I am always looking for ways to save cash, eat more healthily and teach the kids something fun/useful/life changing. If I can do one thing and achieve all three then, even better.

We are a family of 'almost butter' users, you know the stuff, 'spreadable' butter it is usually called. Not quite margarine, not quite butter. And don't get me wrong it's handy stuff to have, it's spreadable (just like it says on the tin), no sitting butter pats by the kettle or cup of tea trying to melt if just enough to be spreadable but usually ending up with having to drizzle it over your bread! Or the other extreme, just going for it, and attempting to spread the yellow 'cement' and ending with a perfect square of crust and a ball of breadcrumbs and butter stuck to the knife.

That being said there are a multitude of ingredients in these spreads that are not deadly, but I'm guessing we can live without and may even benefit from being without. So an opportunity to step away from them for a time can only be good, in my opinion.

My attempt was also to see if making your own butter was cheaper than buying the same at the supermarket. You can see if I managed at the bottom of my post where I'll give a basic breakdown of my costs. We'll see if I can beat the supermarket!

Whilst out doing a top up shop at our local supermarket (bet you can't guess which one!) I spotted three tubs of their own brand double cream, reduced. The prices were different, no idea why, but averaged at 91p each (I'll round up in all calculations, keep it fair).

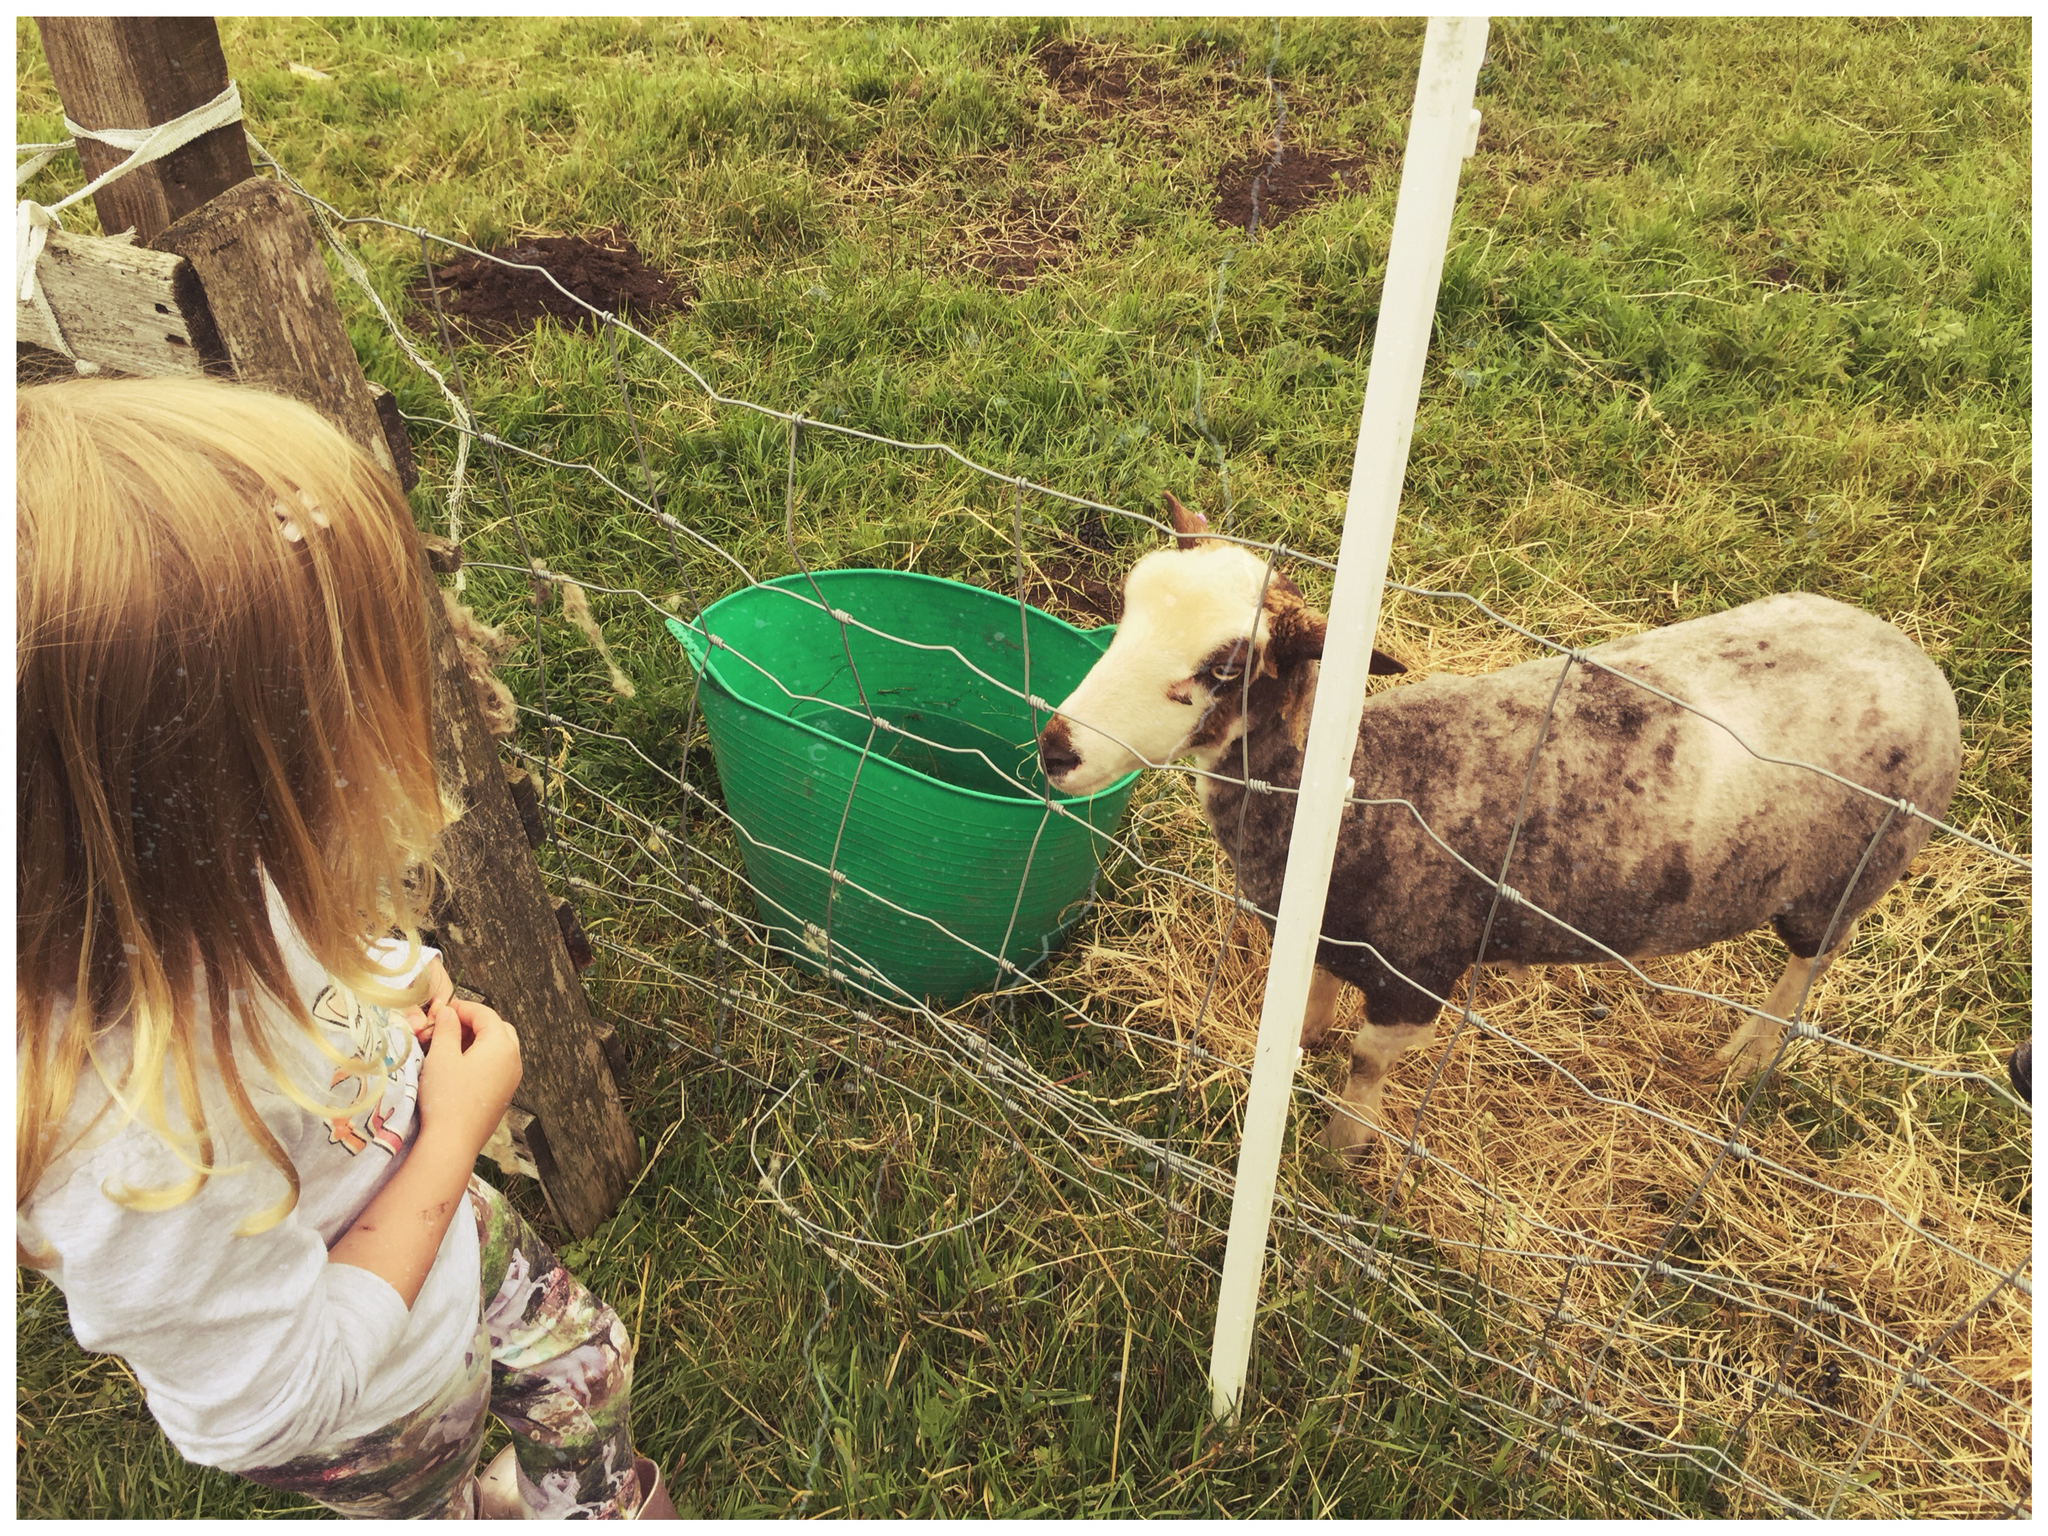
I snapped them up as I had been looking for cream since watching a kids show with my eldest where they explained how butter was made and I had wanted to do same at home, let her actually see the process.

In terms of ridding ourselves of 'nasties' this method does of course still contain whatever they put in the cream, and it doesn't tell you any ingredients, just that it may contain milk. But, unless I nip over the road to the dairy I can't get pure cream..... hmmmmm....

This has to be one of the easiest things you can do at home. It's a little time consuming but the simplicity makes up for that! I'd recommend a stand mixer if your using as much cream as I am. With less you could probably whisk by hand or the jar method below.

Pour all of your cream into the mixer and, using the balloon whisk, get beating. Firstly the cream will get soft peaked, then stiff peaked. This is when you'd normally stop beating but keep going. The cream will then start to breakdown into the butter and the buttermilk. It will look a little like scrambled egg floating in milk. Yum! This is when you stop.

With a sieve over a large bowl pour the whole lot into the sieve and allow the buttermilk to drain.

Once it stops dripping place the butter back into the cleaned mixer bowl and beat again. More buttermilk will appear. Drain this off as before. I repeated this about three times until barely any buttermilk remained.

Next you need to clean your butter. Place your butter blob into a clean bowl and cover with cold water. Squeeze the butter with your hands. The water will go cloudy. Drain the water and recover with fresh cold water. Repeat this until the water stays clear.

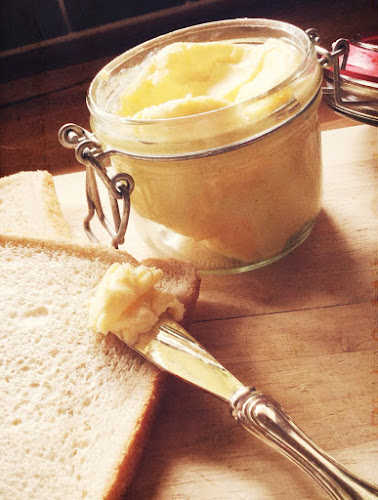
Your butter is now ready to be shaped into blocks, or however you wish to store it. If you have butter pats then use them, if not, like me, just use your hands. I split my butter into three equalish sized blobs and gave them a bit of a squeeze over the sink before shaping, just to ensure I'd got any excess water out. They can then be wrapped in greaseproof paper and frozen or used straightaway.

Butter in Jar
Get spreading and enjoying!

If you want to salt your butter, then you will need about 1/4 tsp of salt per 110g of butter. To salt the butter spread it out on a sheet of greaseproof and sprinkle over the salt. Roll up and place in a bowl, give it a good squishing with your hands to distribute the salt evenly.

I do salt my butter and there are two reasons people choose to. One is taste and the other is that the salt will help the butter last longer. I salt mine for both reasons but sometimes leaving a block unsalted is great for when there is baking to be done!

Your butter is now made and ready to be enjoyed! Remember to retain that buttermilk, there are many uses for it. It can be frozen but remember if you do it will separate so will need to be whipped again after defrosting before you use it!

But the question on everyone's lips is.... was it worth it? And my short answer is ..... Yes!

Here's my breakdown, I hope I got the Maths right!

Butter

Total cost of cream: £2.82

Weight of butter made: 860g

Cost of my butter: 33p per 100g

Comparison Prices

Asda own brand, Salted: 34p per 100g

Lurpak, Salted: 68p per 100g

So I beat Asda own brand by 1p per 100g but was significantly cheaper than the branded. But I also got 700ml of buttermilk from my cream. Now I only found one company that sells its buttermilk in millilitres rather than grams, so for ease I used them to determine how much my buttermilk would've cost to buy.

Buttermilk

Buttermilk at 18p per 100ml: £1.26

Direct Cost Comparison

My butter and buttermilk cost: £2.82

Equivalent amount of Asda own butter and buttermilk: £4.18

Equivalent amount of Lurpak butter and buttermilk: £7.11

Not a bad saving regardless of the company or brand. So I think this experiment has been a big success! But to top it off, as I mentioned above this was also a great learning experience for my 4 year old. By placing a small amount of cream into a jar, screwing on the lid tightly and letting her shake like crazy, she was able to make her own butter. Then she could get stuck right in with the cleaning, squeezing her butter clean. After we'd finished we immediately had to make two rounds of toast to try it out! She loved the whole thing!

Let me know if you take up the butter challenge! Let me know how it goes!


Thursday 25 June 2015

I've Got Worms

*BACKDATED from August 2014*
And I got them through the post!
I have been thinking about getting a wormery for a while. My mum had one years ago and it was amazingly useful and her vegetables certainly appreciated it!
For those not familiar with the idea of a wormery I shall attempt to explain. It is basically a large plastic bin with some worms in it. You add your kitchen scraps and garden clippings in at the top and the worms break it all down turning it into compost and a liquid fertiliser. Job done!

Ok, so, the original plan was to get my mums old one but after inspection it was a little worse for wear so, as a late birthday present she bought me a new one! Hurray! Well, she gave me some money and told me to order what I needed!

I searched various locations to purchase but kept coming back to "The Original Wormery" company. They were the makers of my mums one, so I knew what I was buying and they certainly seemed to know their stuff.

They offer a wide range of sizes and shapes depending on what you are after, how many people in your house. There is even one for dog poop! I considered this but as this can't be used on vegetables it isn't the best use of my money. But if you have a dog and a passion for flowers then this is definitely a possibility.

So after much reviewing of their products I settled on "The Original Wormery". It seemed to cover our needs the best. You get the Wormery itself, the worms, some lime mix and full instructions.

Waiting for it to arrive seemed like it took forever, sitting by the window. Waiting. Waiting.

While we are waiting I'll tell you more about the Wormery. The worms themselves are not your common earthworms, like the kind you find in the garden. They are called Tiger Worms. There are various varieties that would work in a Wormery but the Tiger Worm is chosen because of their ability to adapt to a variety of conditions. They also have a good composting rate, which is obviously a big plus!

And they are all pretty and stripey! Pretty for a worm anyway!


When it arrived it came literally as is! Just with some cellophane wrapped around it! Postman must've been scratching his head over this one!

(Use film trailer deep voice) The item came with everything pictured here!

Set up was very basic, even I managed it! I had to insert a plastic 'platform' into the base. This allows the liquid fertiliser to drain through and keeps your worms up and out of it. It was just a case of sliding it in! The tap at the front needed screwing in. And that was as technical as building it got!

Next was to set up the worms. Again, very simple. Placed a sheet of paper on the platform and emptied them, and their bedding (soil) into a pile in the middle of it. Next a handful or two of kitchen scraps on top. That's it! Wormery set up!

It is nessecary to leave the worms to it for about 6-8 weeks, only adding one handful of kitchen scraps per week. After that the colony is established and you can add your scraps as and when!

This Wormery can be kept indoors as it is pong protected but we just don't have the space inside so it is outside the kitchen door. I propped it up on some bricks to make draining the liquid off easier. You can buy a specific base but this does just fine! It is not as wobbly as it looks, I promise!

I am hoping that I can successfully get them through the winter, that's the biggest issue with starting them so late in the year. I am hoping they will be well snuggled in by then with plenty wormy compost!


*I am not getting anything for discussing Original Wormery stuff, these are just my own opinions and recommendations!*